 OfficePro Electric Sharpener
 T'Gaal Sharpener
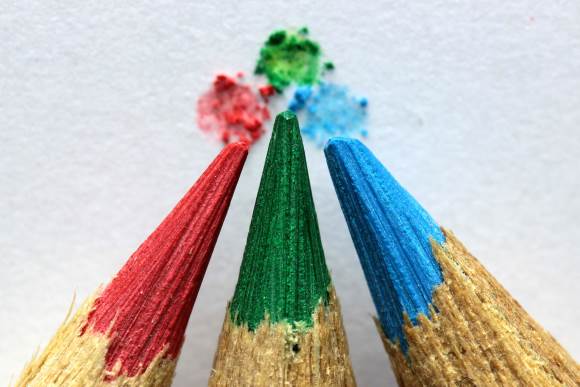
Pick up a few “tips” and “pointers” for sharpening colored pencils.
Sharpening pencils is easy to do. Most of us have been doing it since we were little kids. Put the pencil in the sharpener, twist, remove. Isn’t that all there is to it?
Yes and no.
The obvious methods will get you a sharp point easily enough. However, there are a few key factors to keep in mind that can help you avoid breakage, reduce waste, and keep your pencil tips in top condition.
What’s the best way to sharpen colored pencils to reduce damage?
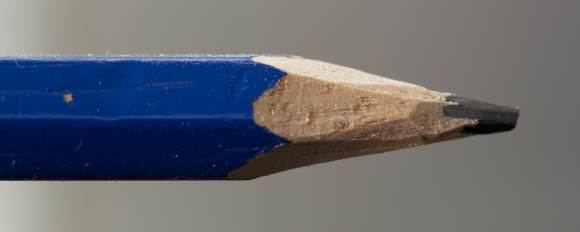
One of the most aggravating things for a colorist is a broken pencil point. This is especially true when it happens during sharpening, or several times in a row. Your coloring supplies are important to you, and it’s always upsetting when they get damaged. Keeping your pencils safe and secure is the best way to prevent lead breakage and internal fractures. Still, there are a few rules you’ll follow when you know how to sharpen a pencil without breaking the lead.
Use a sharp sharpener
It sounds silly to say, but your sharpener needs to be sharp. The majority of pencil sharpeners consist of a thin blade that is held at an angle and fastened in a fixed position. As the pencil rotates in the slot, the edge of the blade shaves off a thin outer layer of wood and pigment.
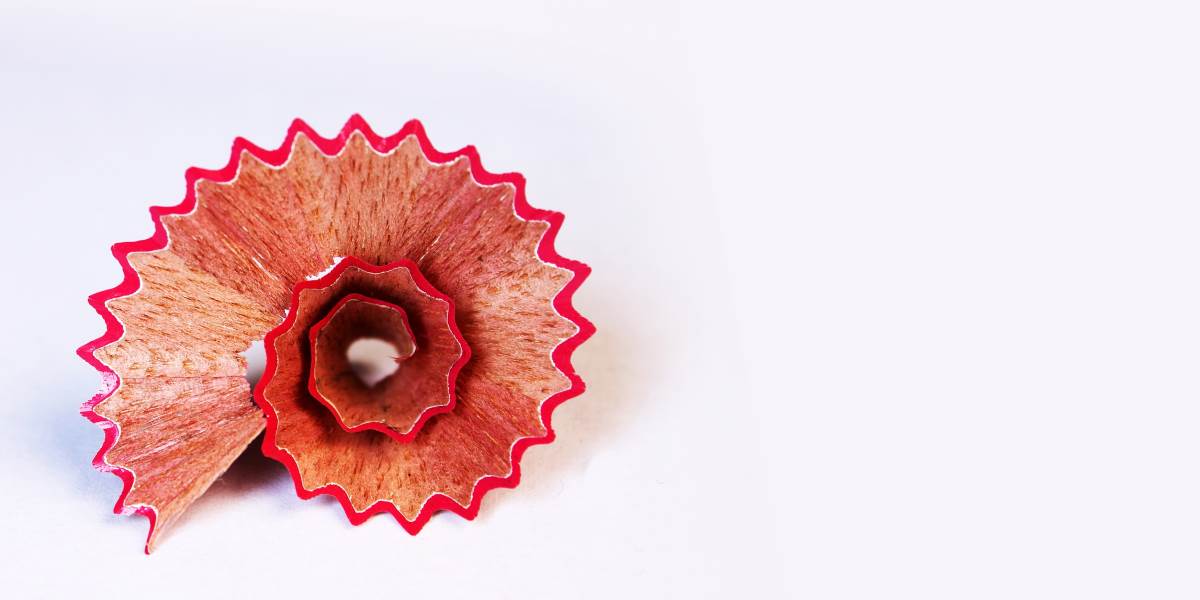
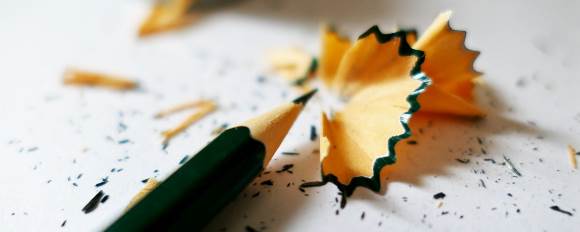
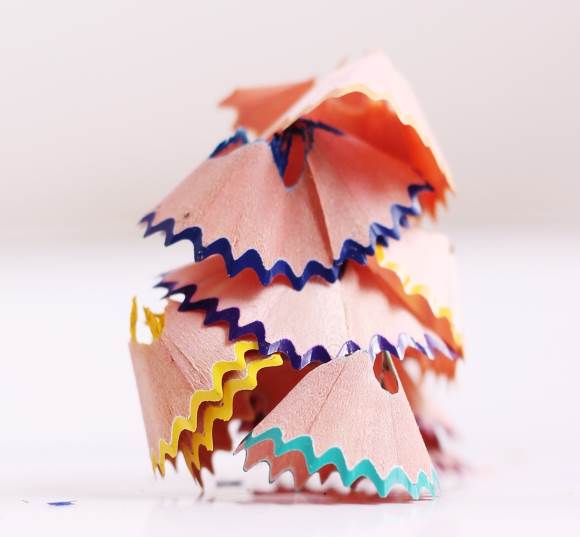 A sharp sharpener will give you long, unbroken pencil shavings.
Just like a shaving razor, a dull sharpener blade will start to snag and pull the surface of the pencil. This results in fractures and breakage. It also puts more stress on the pencil’s pigment core. A dull sharpener will still get a pencil sharp, but you’ll be wasting lead in the process. If the pressure causes any internal damage, you could be looking at a serious problem.
A good sharpener should be able to produce a long, unbroken shaving when you use it. If the shavings come out in little fragments, that is a sign that you are dealing with a dull blade.
Most pencil sharpeners won’t even let you remove the blade, so if you’re dealing with a dull edge, a replacement sharpener is likely your best option. Blades do wear out over time, but you should keep your sharpener dry do avoid any premature rusting. You can also consider oiling to the blade from time to time for a smoother cut.
Twist the sharpener, not the pencil
When you sharpen your pencils, do you twist the pencil or the sharpener? Maybe you’ve never though about it and can’t even answer for certain. Maybe you twist them both! Regardless of your answer, from now on you should always twist the sharpener while you hold the colored pencil firmly in place.
Thinking back to our shaving razor example, this starts to make sense. The blade should be move and cut into the pencil, which remains fixed in place. This helps the sharpener cut cleanly into wood of the pencil. When the pencil is rotated instead of the sharpener, there is more of a chance for splintering and broken tips.
Also, be sure to clear any excess shavings from the mouth of the sharpener. If shavings start to clog up the exit, the new shavings back up and get in the way of the blade.
Can you sharpen colored pencils in an electric sharpener?
Yes. Should you? Probably not.
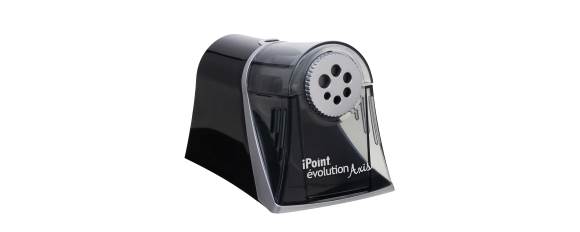
While electric sharpeners provide a faster method for sharpening, this comes with a price. The high speeds put more stress on the pencil, which can increase the chance of damage. This is especially true for older sharpeners with dull blades. If you’re not careful, they will chew your pristine pencils up and spit them back out before you can blink.
That aside, the speed also increases the amount of waste. It’s easy to over-sharpen colored pencils in an electric sharpener, eating up extra lead that you would otherwise be coloring with. This isn’t a huge issue with cheaper supplies, but premium colored pencils are expensive. You want to get your money’s worth out of an expensive colored pencil set, not grinding it up in an electric sharpener.
Are manual pencil sharpeners annoying to use? Sure. However, they really are the best option for getting the sharpest points and keeping your colored pencils going as long as possible.
Now that your pencils are nice and sharp, are you ready to learn some colored pencil techniques?
Alternative sharpening methods
Nothing beats a pencil sharpener when it comes to sharpening pencils. Still, there are times where you might need to know some alternative methods when there’s no sharpener available. The methods below will work if necessary, but if you care about keeping your pencils in perfect shape, it’s probably better to avoid them.
Sharpening pencils with a knife
At its core, a pencil sharpener is really just a blade. In a pinch, you can use a knife to get a nice point on your pencil.
Whereas a sharpener runs the blade around the perimeter of the pencil, when using a knife, it is far safer to run the blade down the length of the pencil like so:
- Hold the pencil firmly in one hand with the tip pointed away from you.
- Place the knife blade perpendicular to the length of the pencil, just below the existing point.
- Angle the blade of the knife inward until the cutting edge of the blade touches the wood of the pencil.
- In one motion, run the knife blade down the length of the pencil towards the point, shaving off excess wood and pigment.
- Rotate the pencil and repeat until the point is sharp.
A knife provides an unbalanced and inefficient way to put a fresh point on a pencil. Unless your an architect on a job site, there is really no good reason to use one. For your own safety alone, you should only use this method as a last resort.
Sharpening pencils with a file
A safer but more unorthodox alternative method is to use a file or sandpaper block to sharpen your pencils. The process isn’t quick, and it certainly isn’t good for your pencils, but it is definitely a safer option compared to the knife. Follow these steps to sharpen a pencil on a file:
- Grasp your pencil an inch or so below the point.
- Hold the tip of the pencil against the file so that the side of the tip is flush against the surface of the file.
- Gently rub the tip of the pencil back and forth against the surface of the file.
- Rotate the pencil as you run the tip back and forth against the surface until it is sharp.
Using this strategy, it is easy to lose a lot of your lead in the process. Applying too much pressure during the filing can also damage the pigment core.
Repeated breakage during sharpening
What’s worse than breaking a point? Breaking that some point five times in a row. It’s not a fun experience, and if you are not careful, you’ll sharpen your pencil until you can’t even use it anymore.
If you find that a pencil keeps breaking after multiple sharpenings, the first thing you should do is stop sharpening it. The root cause is most likely internal damage, and sharpening will only make that problem worse.
The pigment at the tip of your pencil breaks all the time. It’s designed to do that; that’s how the color gets added to the page. However, when the pigment core breaks within the pencil, it can cause a whole bunch of problems.
If you’re experiencing this problem with a brand new set of pencils, you should consider contacting the provider. Damage during shipping is very common with colored pencils, and most reputable sources are more than willing to replace your order in this case.
It may also be the result of a manufacturing issue. If the pigment core is not given adequate time to cool during manufacturing, it can become detached from the wood of the pencil. This allows is to move around freely within the inner hollow of the pencil. If you find your lead not only breaking, but sliding out from within the pencil, you should contact the manufacturer and request a replacement.
Repairing internal pencil damage
All too often, the damage is not the supplier’s fault, but our own. Pencils get dropped, tapped, chewed up, stepped on, and thrown – that’s life. If you’re dealing with an internal break and you think it’s probably your own fault, you can attempt to repair the damage and salvage the pencil.
When colored pencils are made, the lead goes in as a liquid and then cools with the pencil to form a solid pigment core. If this solid core then breaks, its possible to repair it by melting it again. The softer the core of your pencil is, the easier this is to do.
Wax-based pencils like Primsacolors have a very soft pigment core which can be melted fairly easily. Prismacolor recommends setting wax-based colored pencils in the sun to heat them up, but a little more heat may be necessary depending on the extent of the break. Turning your oven on and placing broken pencils near the exhaust port is a safe and simple method for applying a little extra heat if necessary.
Safety is key, and dangerous methods for heating up colored pencils should always be avoided. Never put your colored pencils in the microwave or near an open flame. You are only going to cause more damage to the pencil and possibly to yourself. If remelting a pencil core isn’t solving the problem, it’s probably time to consider it a loss. Use what you can and look for a replacement.
Mastering the art of sharpening
At this point, you should be looking at pencil sharpening with a whole new mindset. You know to keep your blade sharp, and to always choose a manual sharpener over an electric one. You know to hold your pencil and twist your sharpener, and if a pencil keeps breaking, you’ve got it covered.
If you treat your pencils well, they will return the favor. Keeping them safe is half the battle, but if you can do that, these sharpening tips will help keep your pencils pointy for a long, long time.